
My New Summer Staple
Ya'll. Seriously, I'm obsessed with this new summer go-to recipe. Enter, ROASTED FRUIT! Did you know you could roast fruit? If you know me, you know that roasted veggies are the only way I veggie, so when I saw a chef I follow on Instagram randomly talking about roasted fruit I knew I had to try it!
Roasted fruit is the best invention ever as far as I'm concerned. So far, I've used in my morning yogurt, I made some cheesecake bark (more to come on that later), I've eaten it for dessert with some whipped cream, I made roasted strawberry oatmeal crumble, and I put it in some topo with a squeeze of lime and mint and made the best limeade you've ever had!

Does anyone else have those last pieces of fruit that you don't get to and you end up throwing them out? I always over buy when it comes to peaches, nectarines, and stuff like that doesn't keep. Sometimes I end up buying a bunch of berries because they're on sale and get sick of them or have to go out of town, or just don't get around to eating all the berries before they start getting over ripe. I HATE throwing away food, and I never know what to do with it, but now I do, roast it!
Roasting is the perfect answer to all that leftover fruit. Quick, easy, and the fruit ends up lasting a long time in the fridge after it's roasted. Science and stuff, I can't explain it. However, once you roast it, the possibilities are endless. The result is kind of like jelly, only not as gloppy. The flavors are sweet like candy and deep like the best piece of fruit you've ever eaten.
Roasted Fruit

The recipe couldn't be any easier, it's one of those throw it in the pan and let it do its thing sort of recipes.
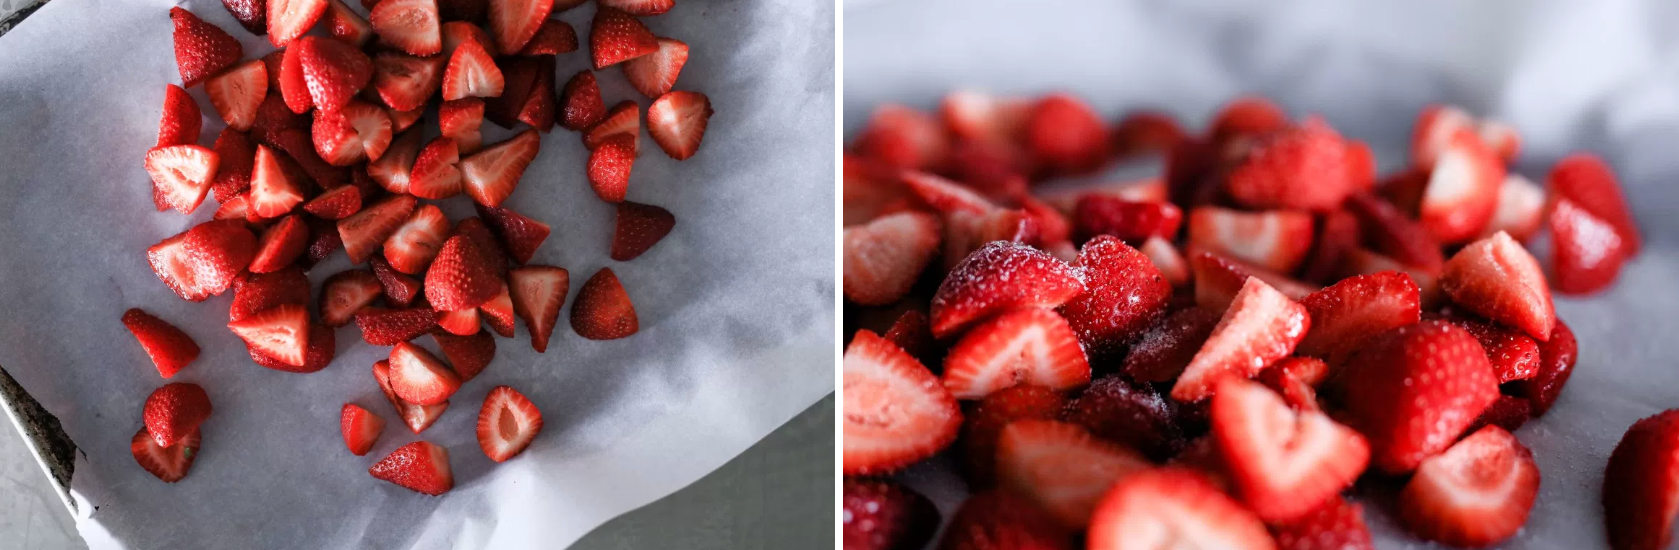
Step 1: Slice & Dice
I went with bit sized pieces. After you've diced the fruit, throw it on a baking sheet and sprinkle with salt. I added a little dusting of sugars because my strawberries were so bland.
Step 2: Amp It Up!
If you want to go basic, just stick with the sprinkle of sugars (optional) and salt. If you want to amp it up, add a drizzle or two of balsamic vinegar. Just trust me and go with the drizzle of balsamic. You won't regret it.


Step 3: Enjoy!
The roasted fruit out of the oven and transfer it to a heat proof bowl (it's HOT) with a lid. Let it cool to room temperature. Once it's cool, you can store it in the fridge for at least 2 weeks, and the freezer even longer!

Step 4: Try Other Fruit.
I used peaches and cherries. Also, note to self, get a cherry pitter.

BALSAMIC ROASTED FRUIT
INGREDIENTS
1 lb strawberries washed and quartered
2 teaspoons brown sugar (optional)
1 teaspoon granulated sugar (optional)
1 tablespoon balsamic vinegar
INSTRUCTIONS
Preheat oven to 350
Spread a layer of strawberries on parchment lined baking sheet
Sprinkle with sugars (depending on the sweetness of the fruit)
Pour the balsamic over the berries
Give it all a toss
Bake in oven for 20 minutes
Crank up the heat to 425 for 15 to 20 minutes
Remove from oven and pour everything (juices and all) into a heat proof dish
Cover and store in the refrigerator for up to 2 weeks
notes:
You can try all different kinds of fruits! I loved the cherries and nectarines.
[BONUS RECIPE] Roasted Fruit Cheesecake Bark
This is where you can get creative! I made some homemade cheesecake bark and it was FABULOUS. This cheesecake bark is so easy! You'll love it, your kids will love it, your boo will love it, it's the perfect afternoon treat on a hot summer day.


ROASTED FRUIT CHEESECAKE BARK
frozen cheesecake bites perfect for a summer treat!
INGREDIENTS
4 oz cream cheese
3/4 cup greek yogurt
1 teaspoon vanilla
1tablespoon honey (or sweetener of your choice)
3 tablespoons roasted fruit + 4 to 5 pieces for the top
INSTRUCTIONS
Combine the cream cheese, greek yogurt, vanilla, and honey
Mix until well combined and smooth
Fold in roasted fruit
Line a baking pan with parchment
Pour out cream cheese mixture into baking pan, and smooth until layer is even
Top with individual pieces of roasted fruit
Cover with cling wrap
Freeze until solid
Break into bite sized pieces
Keep stored in airtight container in the freezer
Grab a bite and enjoy!