
Laundry Room Refresh
When we moved in to our house this summer, there wasn’t anything that had to be done in order for us to get settled. We were so lucky to find a move-in ready house that was the perfect size and location for our lifestyle. The house has been great! It’s got a great layout and flow, big rooms, and decent storage. It really is a house with great potential and “good bones”. Don’t laugh, but one of my favorite rooms in the house is the laundry room.
We’re not sure how long we’ll be here, but we know at this time, we’re not going to spend a ton of money renovating or making a lot of changes. I could see totally gutting the first floor and going crazy, but for now it just doesn’t seem necessary. Anyone else seeing vision boards in our future? I’d love to redo the tile floors eventually with a slate/concrete tile of some kind, but all of that is just vision board stuff. For right now, we want to make it feel like home, but don’t want to be hasty with any big changes. While we work through the list of things we want to do, I wanted to do some quick makeovers to the spaces that we use daily. First up is the laundry room.
The goal with this refresh was to spend minimal dollars and make the space more functional. Y’all, this laundry room space is AMAZING. This house was built in the 80s, so to have a full size laundry room is icing on the cake. It’s got decent storage, space for our deep freezer, and it’s wide enough to have the washer and dryer on one side with hanging clothes on the other. I honestly couldn’t have asked for a better space.

Must Have
For my must have list, I really didn’t have much in mind. I just wanted it to look decent when you walked by the hallway and serve all the many purposes with ease. I had to have a top loading washer. I know this totally takes away from the aesthetic, but it was a must have to have a simple/old school washer and dryer that was easy to repair, and the less technology the better… I’m not trying to replace this washer and dryer in a year. We also wanted to have our deep freezer inside, easily accessible. We basically use the freezer daily, and for efficiency it’s always better to have them inside vs. in a garage. Hanging space was crucial, I hang dry A LOT of clothes, so keeping that area was a must.
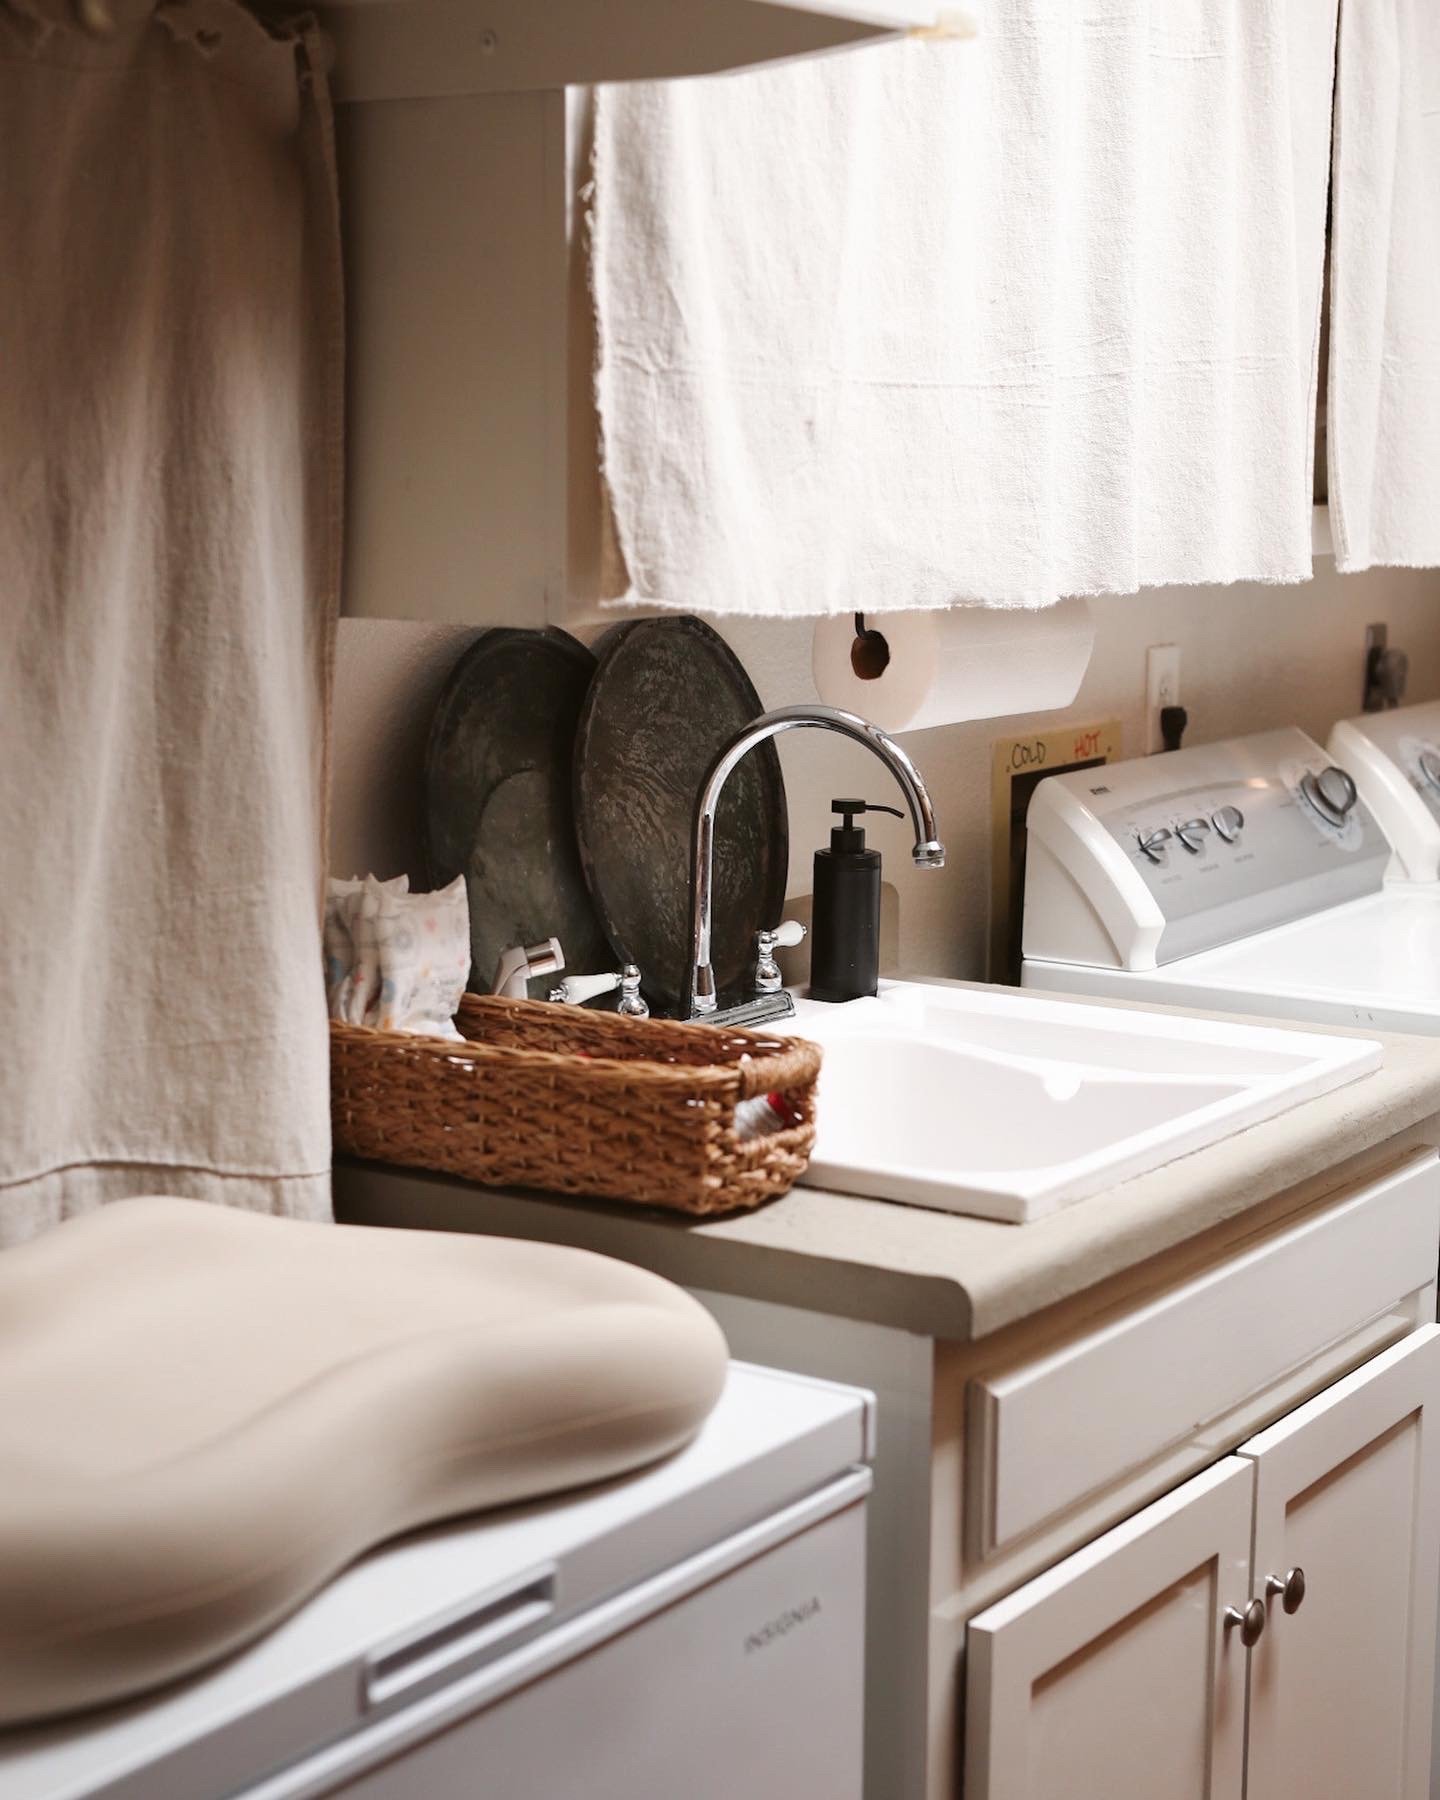
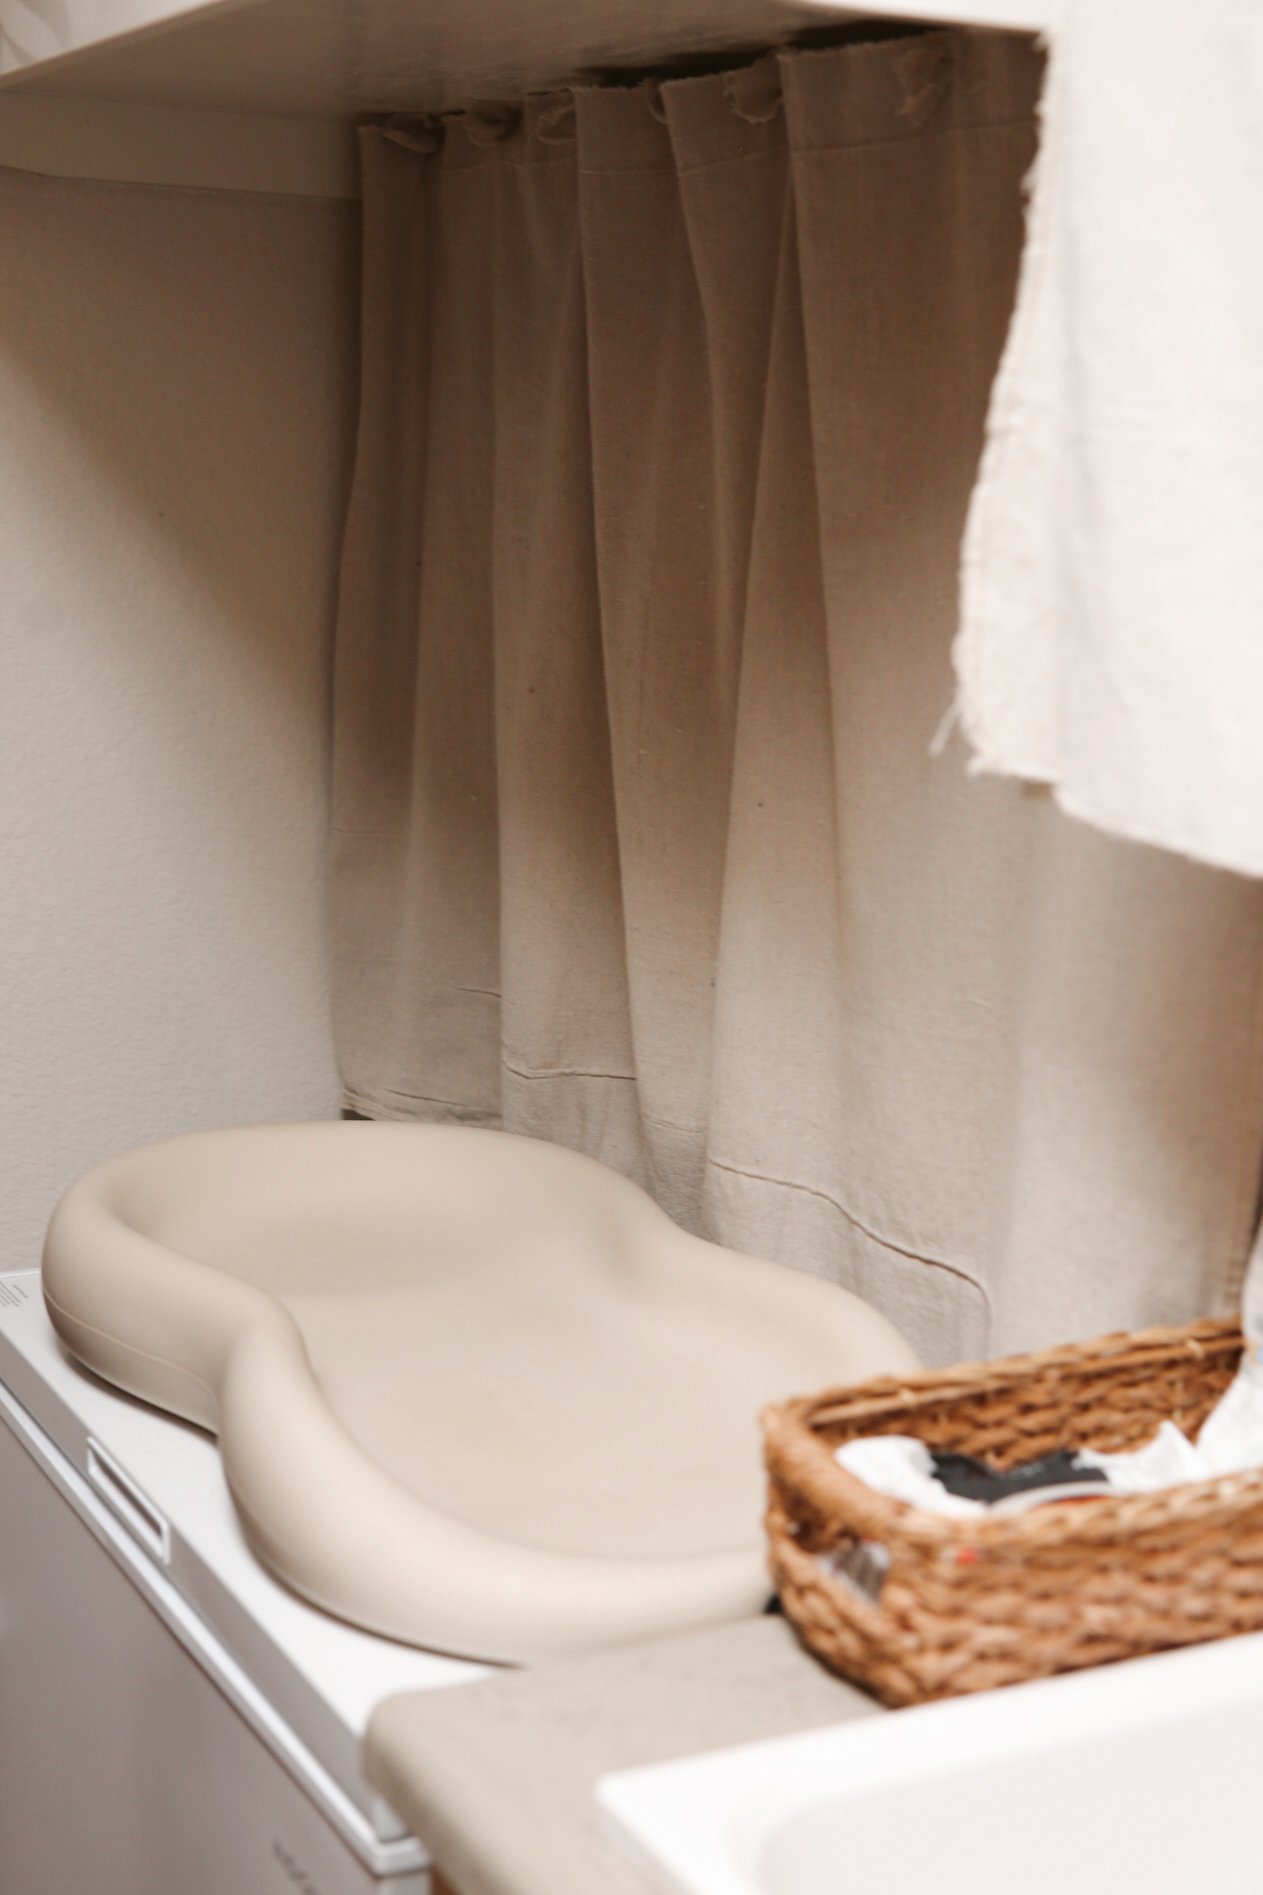
The odd ball in this equation is this also serves as a space for Emma. Since “Emma’s Room” is technically upstairs and we spend most of our time downstairs, this space has quickly become her changing area, closet, and storage for all her junk. She takes her nightly bath in the HUGE sink and all her diapers/wipes/etc. are stored here. It has really been perfect during this season of our lives, and when we “renovated” this space, keeping her stuff as part of the plan was essential.
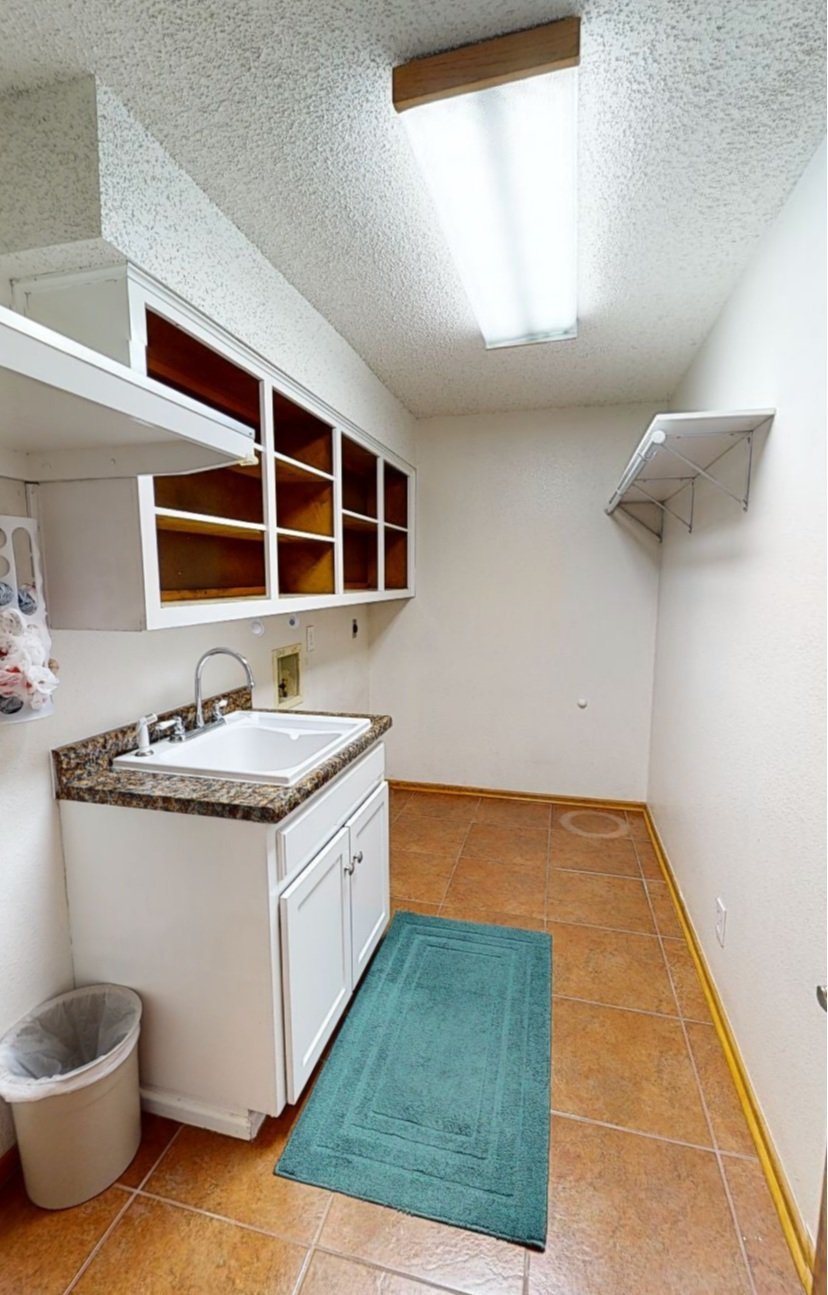
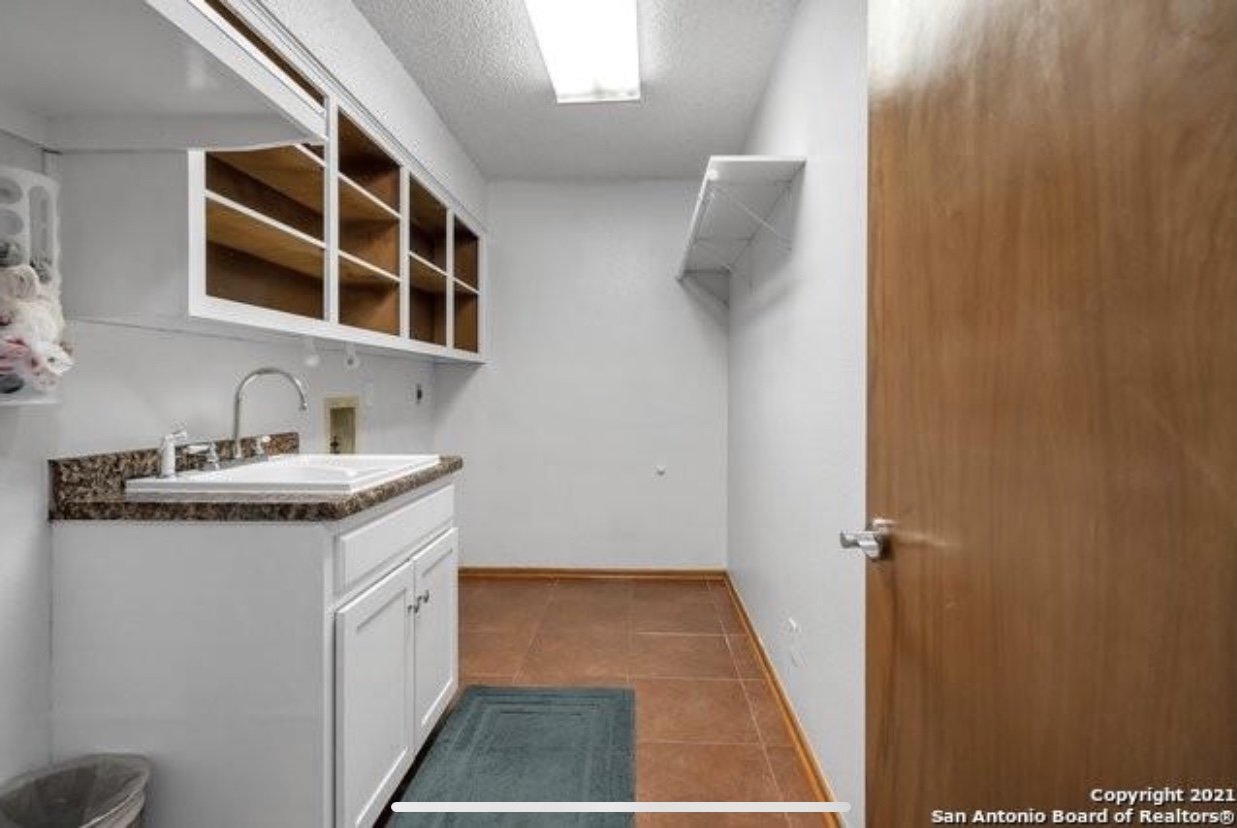
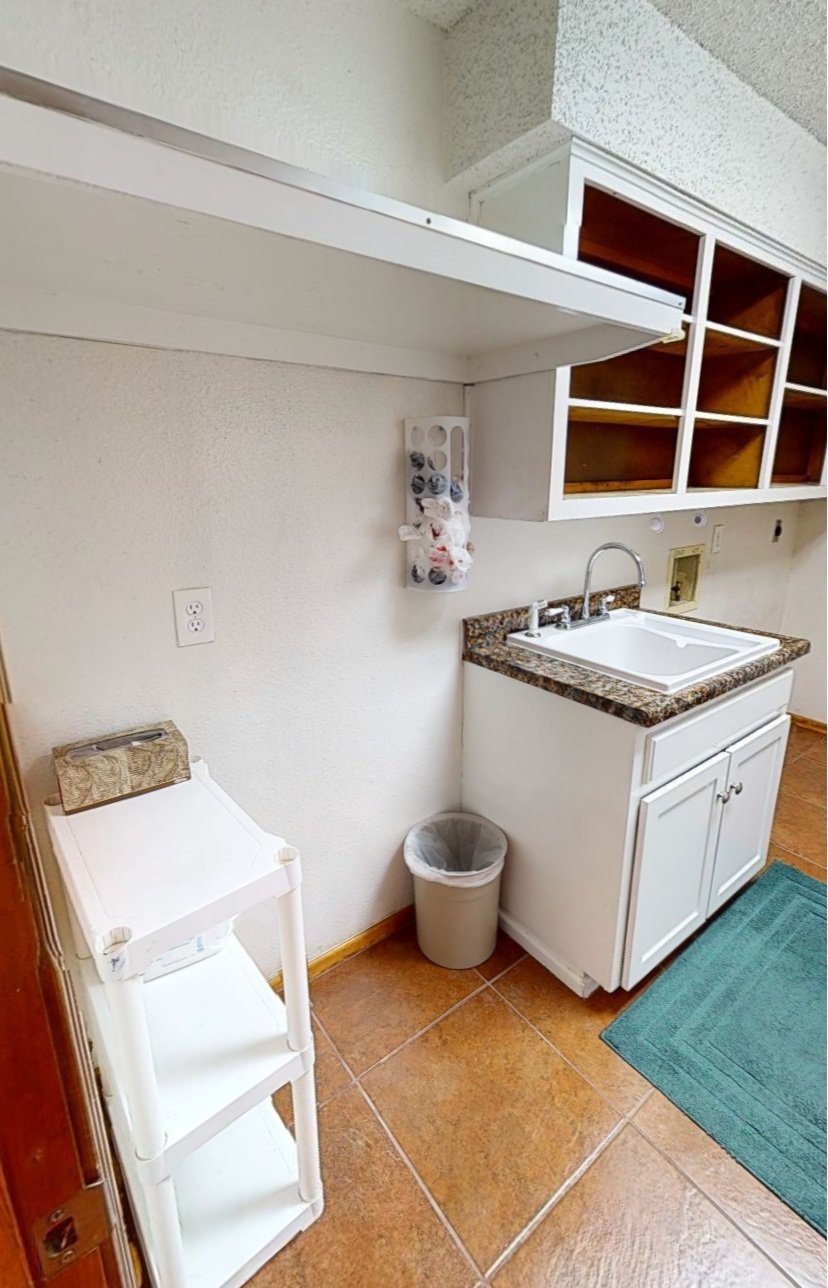
Before
As you can tell from these listing photos, there wasn’t much of anything going on here. They had removed the fronts of the cabinets, sponge painted the top of the sink counter, and mounted a shelf and hanging bar across from the washer/dryer space. All in all it was a decent canvas to work with, and didn’t need much prep work. It didn’t have a ton of storage, but there was definitely space available to add some. The things I decided to ignore for now were popcorn on part of the ceiling, paint color, and lighting.

The Plan
Layout
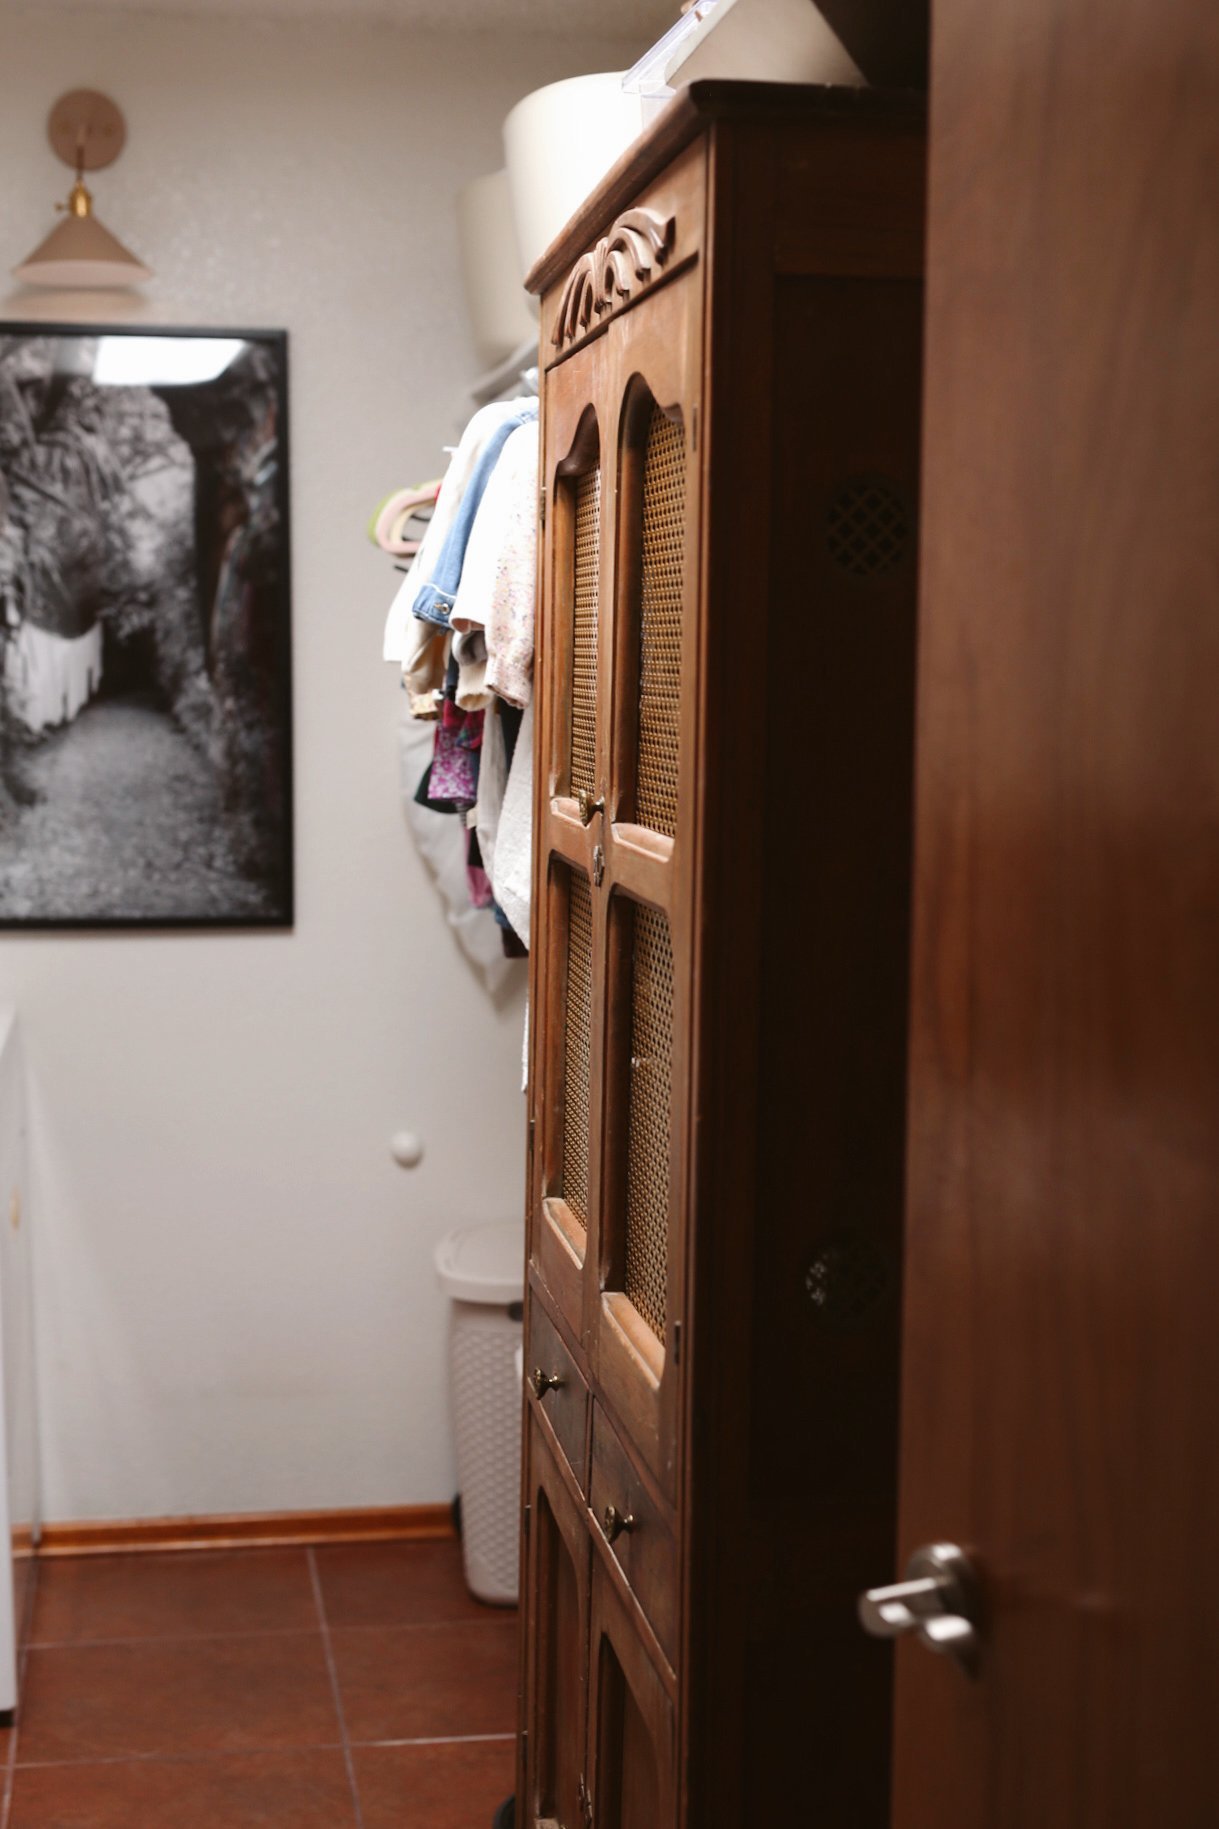
First things first, the layout and plan. The left side of the room just fell into place. The washer and dryer hookup are where they are, all the way in the back left of the room. The deep freezer happened to fit PERFECTLY in the space just before the sink. We were so lucky! It’s a PERFECT spot for the freezer and with the addition of the peanut it became the perfect changing area. The right side of the room had a lot of space between the hanging bar and the door. We thought through a lot of things/look at a lot of cabinets online, but nothing felt right. I wanted to add some warmth to the space, so it needed something old. We finally came to the conclusion that we had THE PERFECT solution sitting in my mom’s paint shed, an antique pie safe that she had been using for paint storage. The story of the pie safe is actually pretty sweet. When my grandmother was younger and they were so broke, she bought this pie safe and ended up having to feed my grandfather beans for dinner for who knows how long in order to pay for it. She was so excited to see it in our house because it held so many memories for her, and that made having it in this space even better! I firmly believe in mixing old with new, and that you have to dig sometimes to find something great that just makes the space. Not only is the storage in the pie safe perfect for Em’s dirty clothes, pjs, and shoes, it really makes the space feel less tactical. It also hides a lot when you’re walking down the hall.
cabinets, lighting, and details.
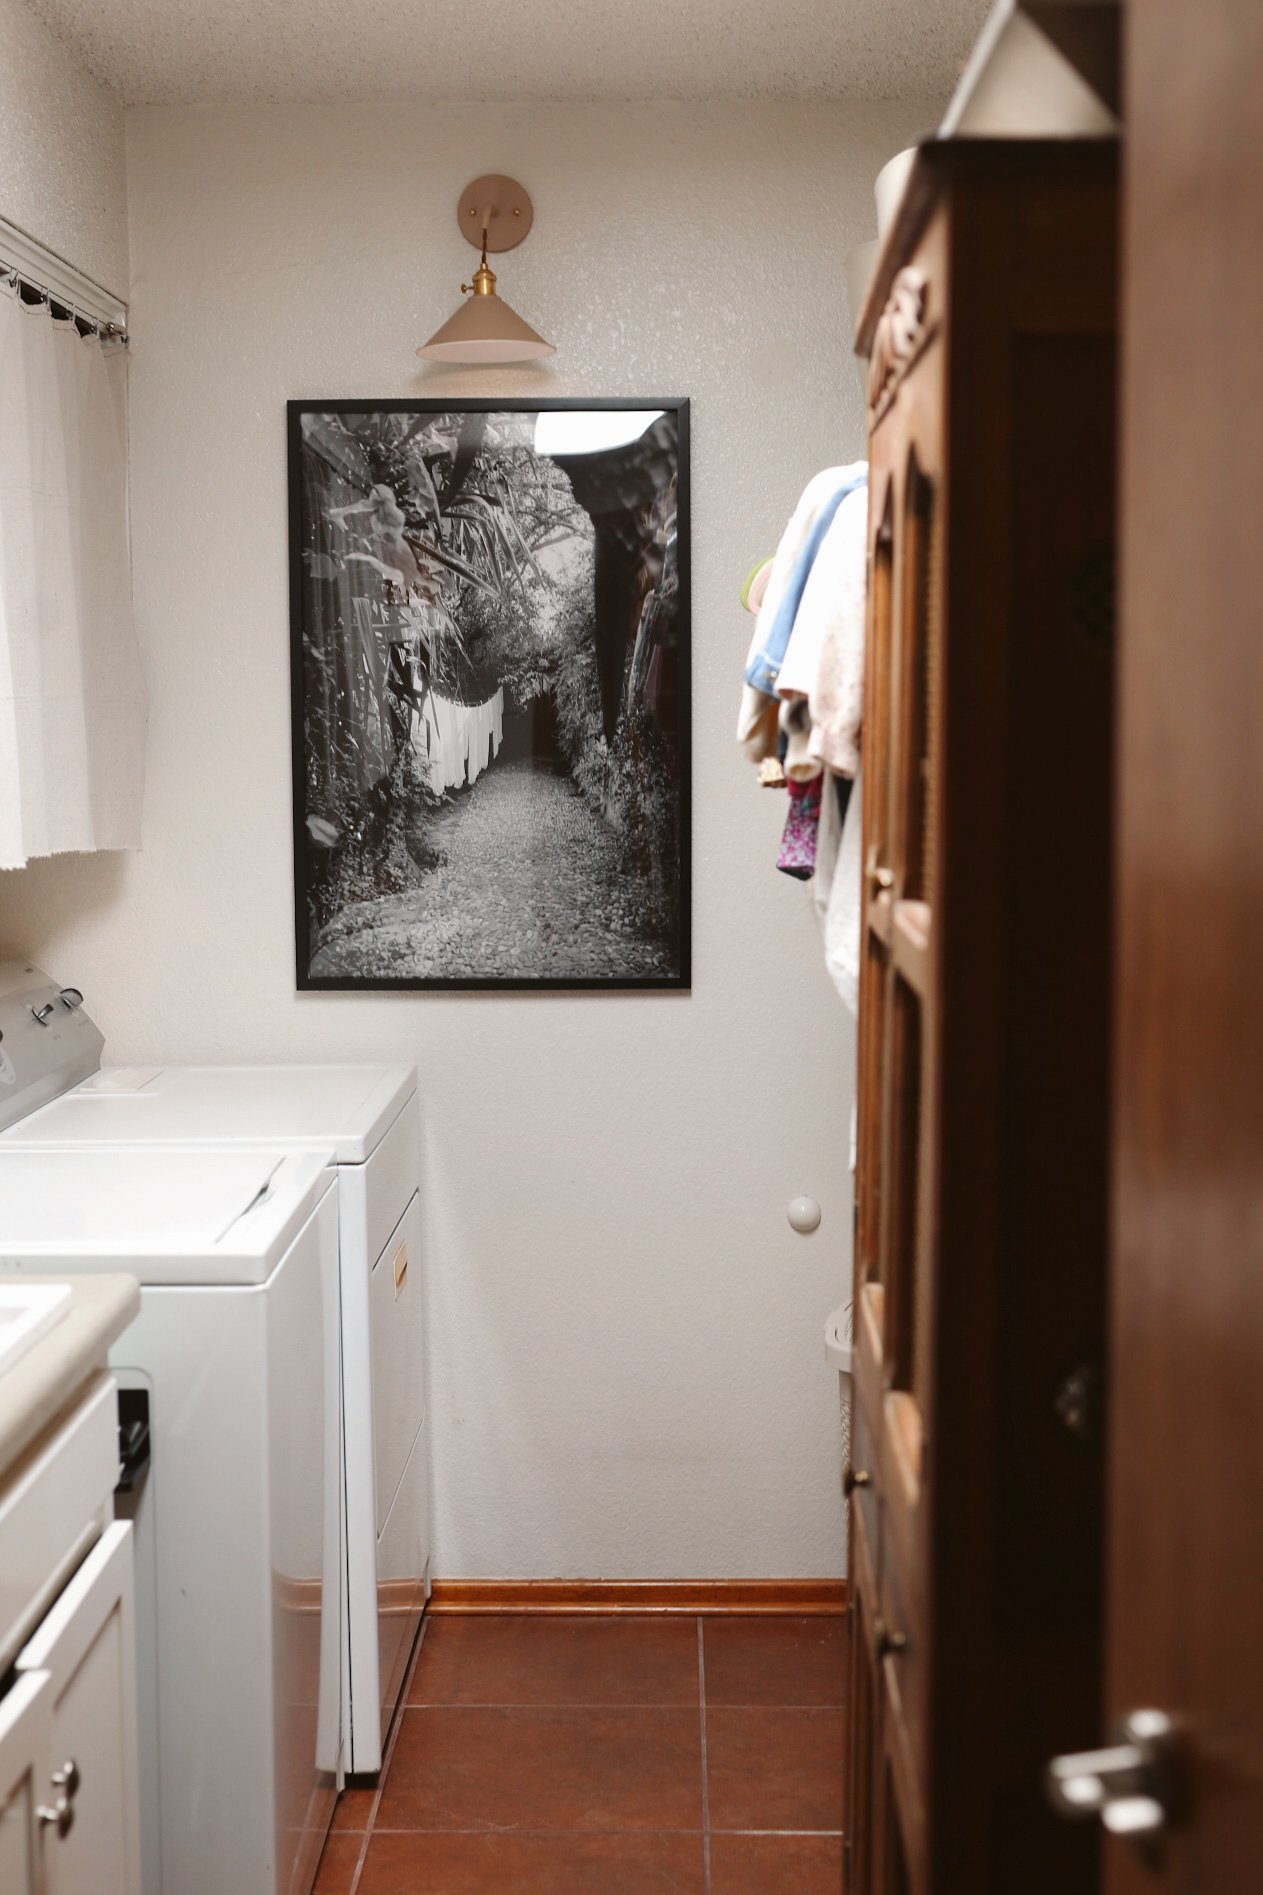
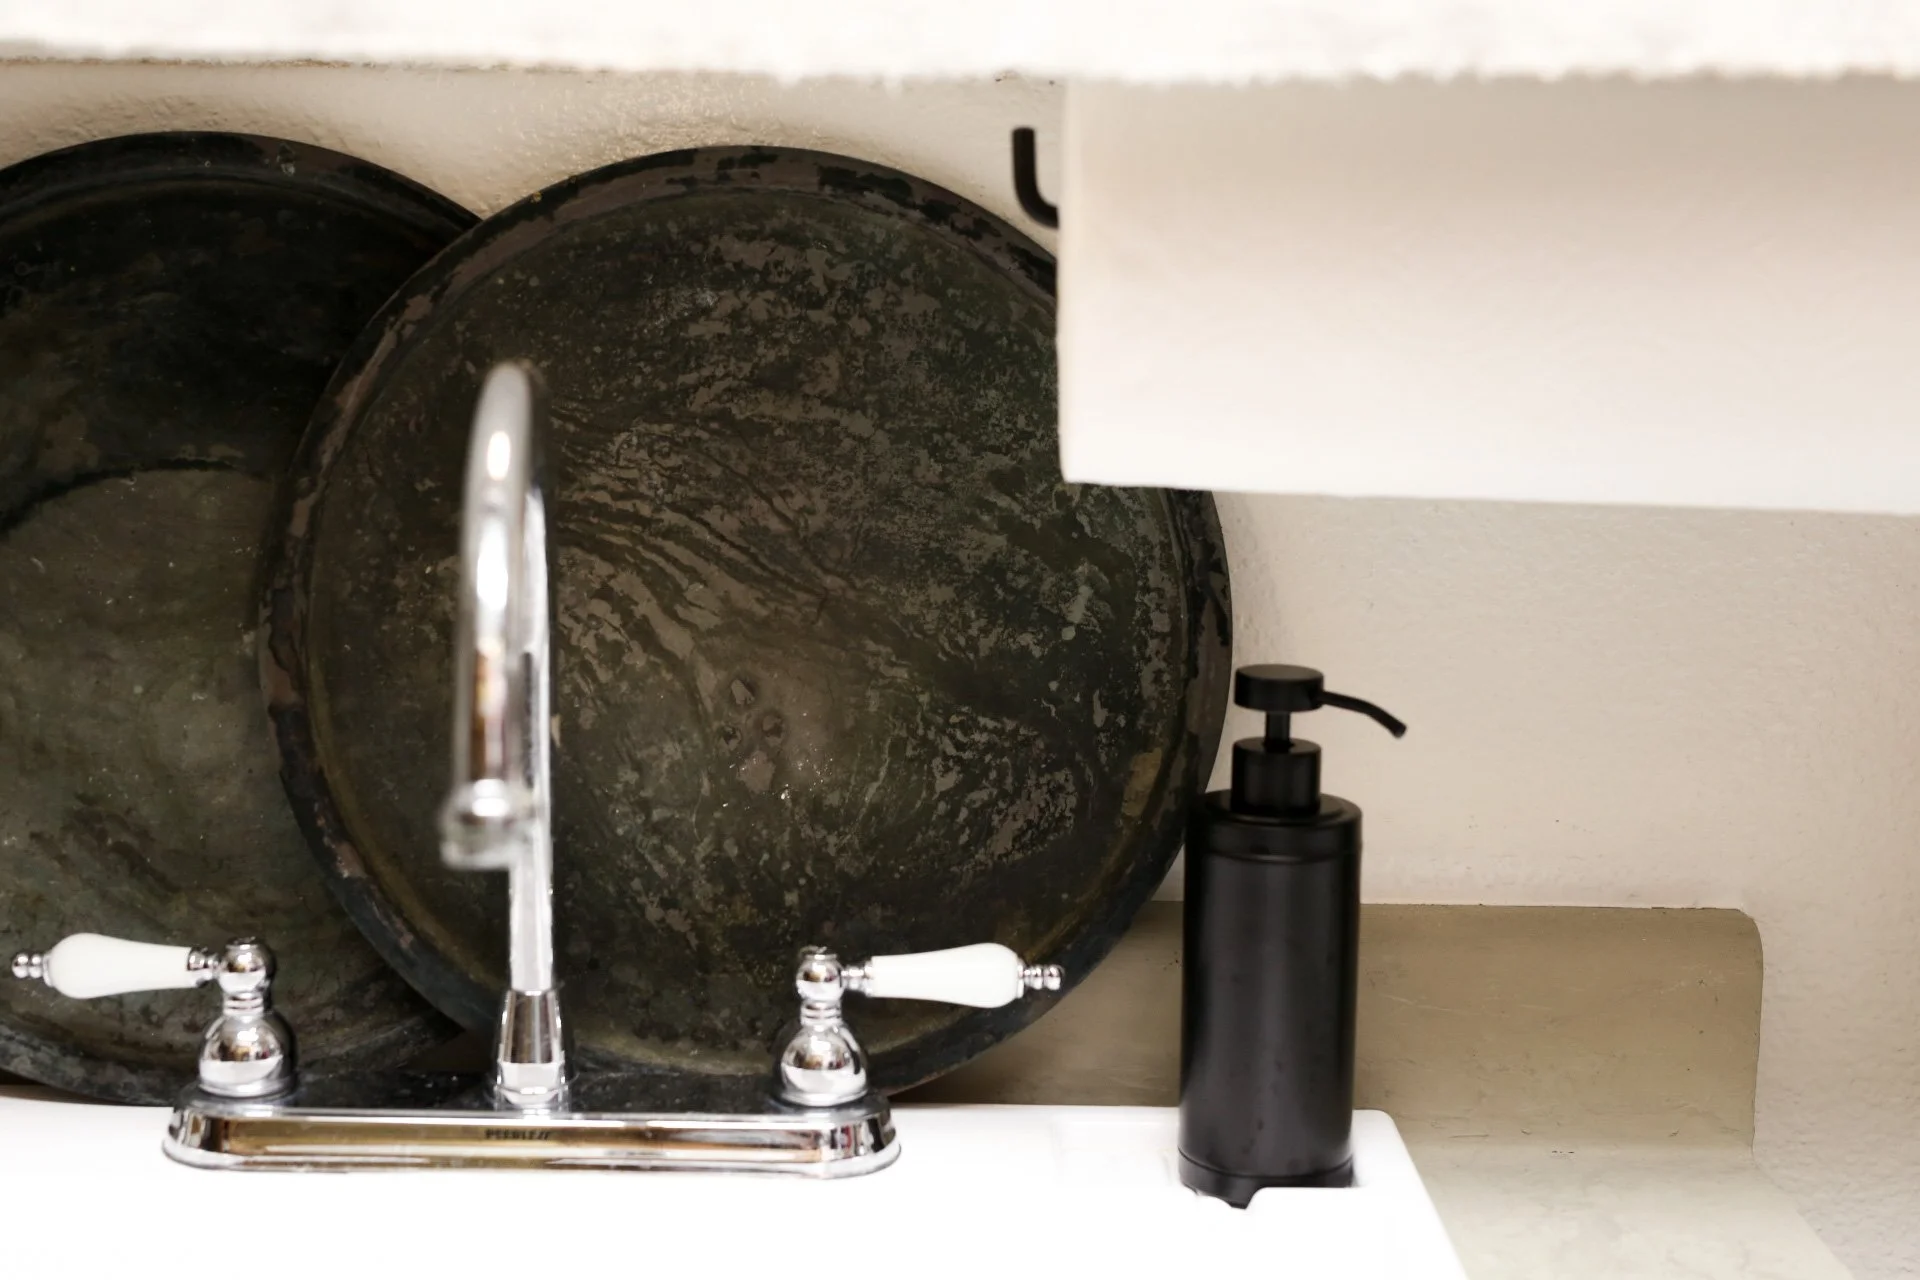
For the cabinets, we thought maybe we’d have some fronts made, but that was going to take forever with all the supply issues going on, and I wanted something ASAP. We opted for… you’ll never guess… DROP CLOTH! We bought a great tension wire kit, metal clips, cut up some drop cloth, and called it a day. At first it was just going to be temporary, but I just love the look it gives the space. I also took some leftover cloth and old tension rod, and made a curtail for the wall above the deep freeze. There’s an outlet there and Em continually played with it, so I solved that problem! Plus I think it gives it a nice, finished look. I’m thinking I might do something similar behind the washer and dryer to cover the hoses and outlets. What do you think?

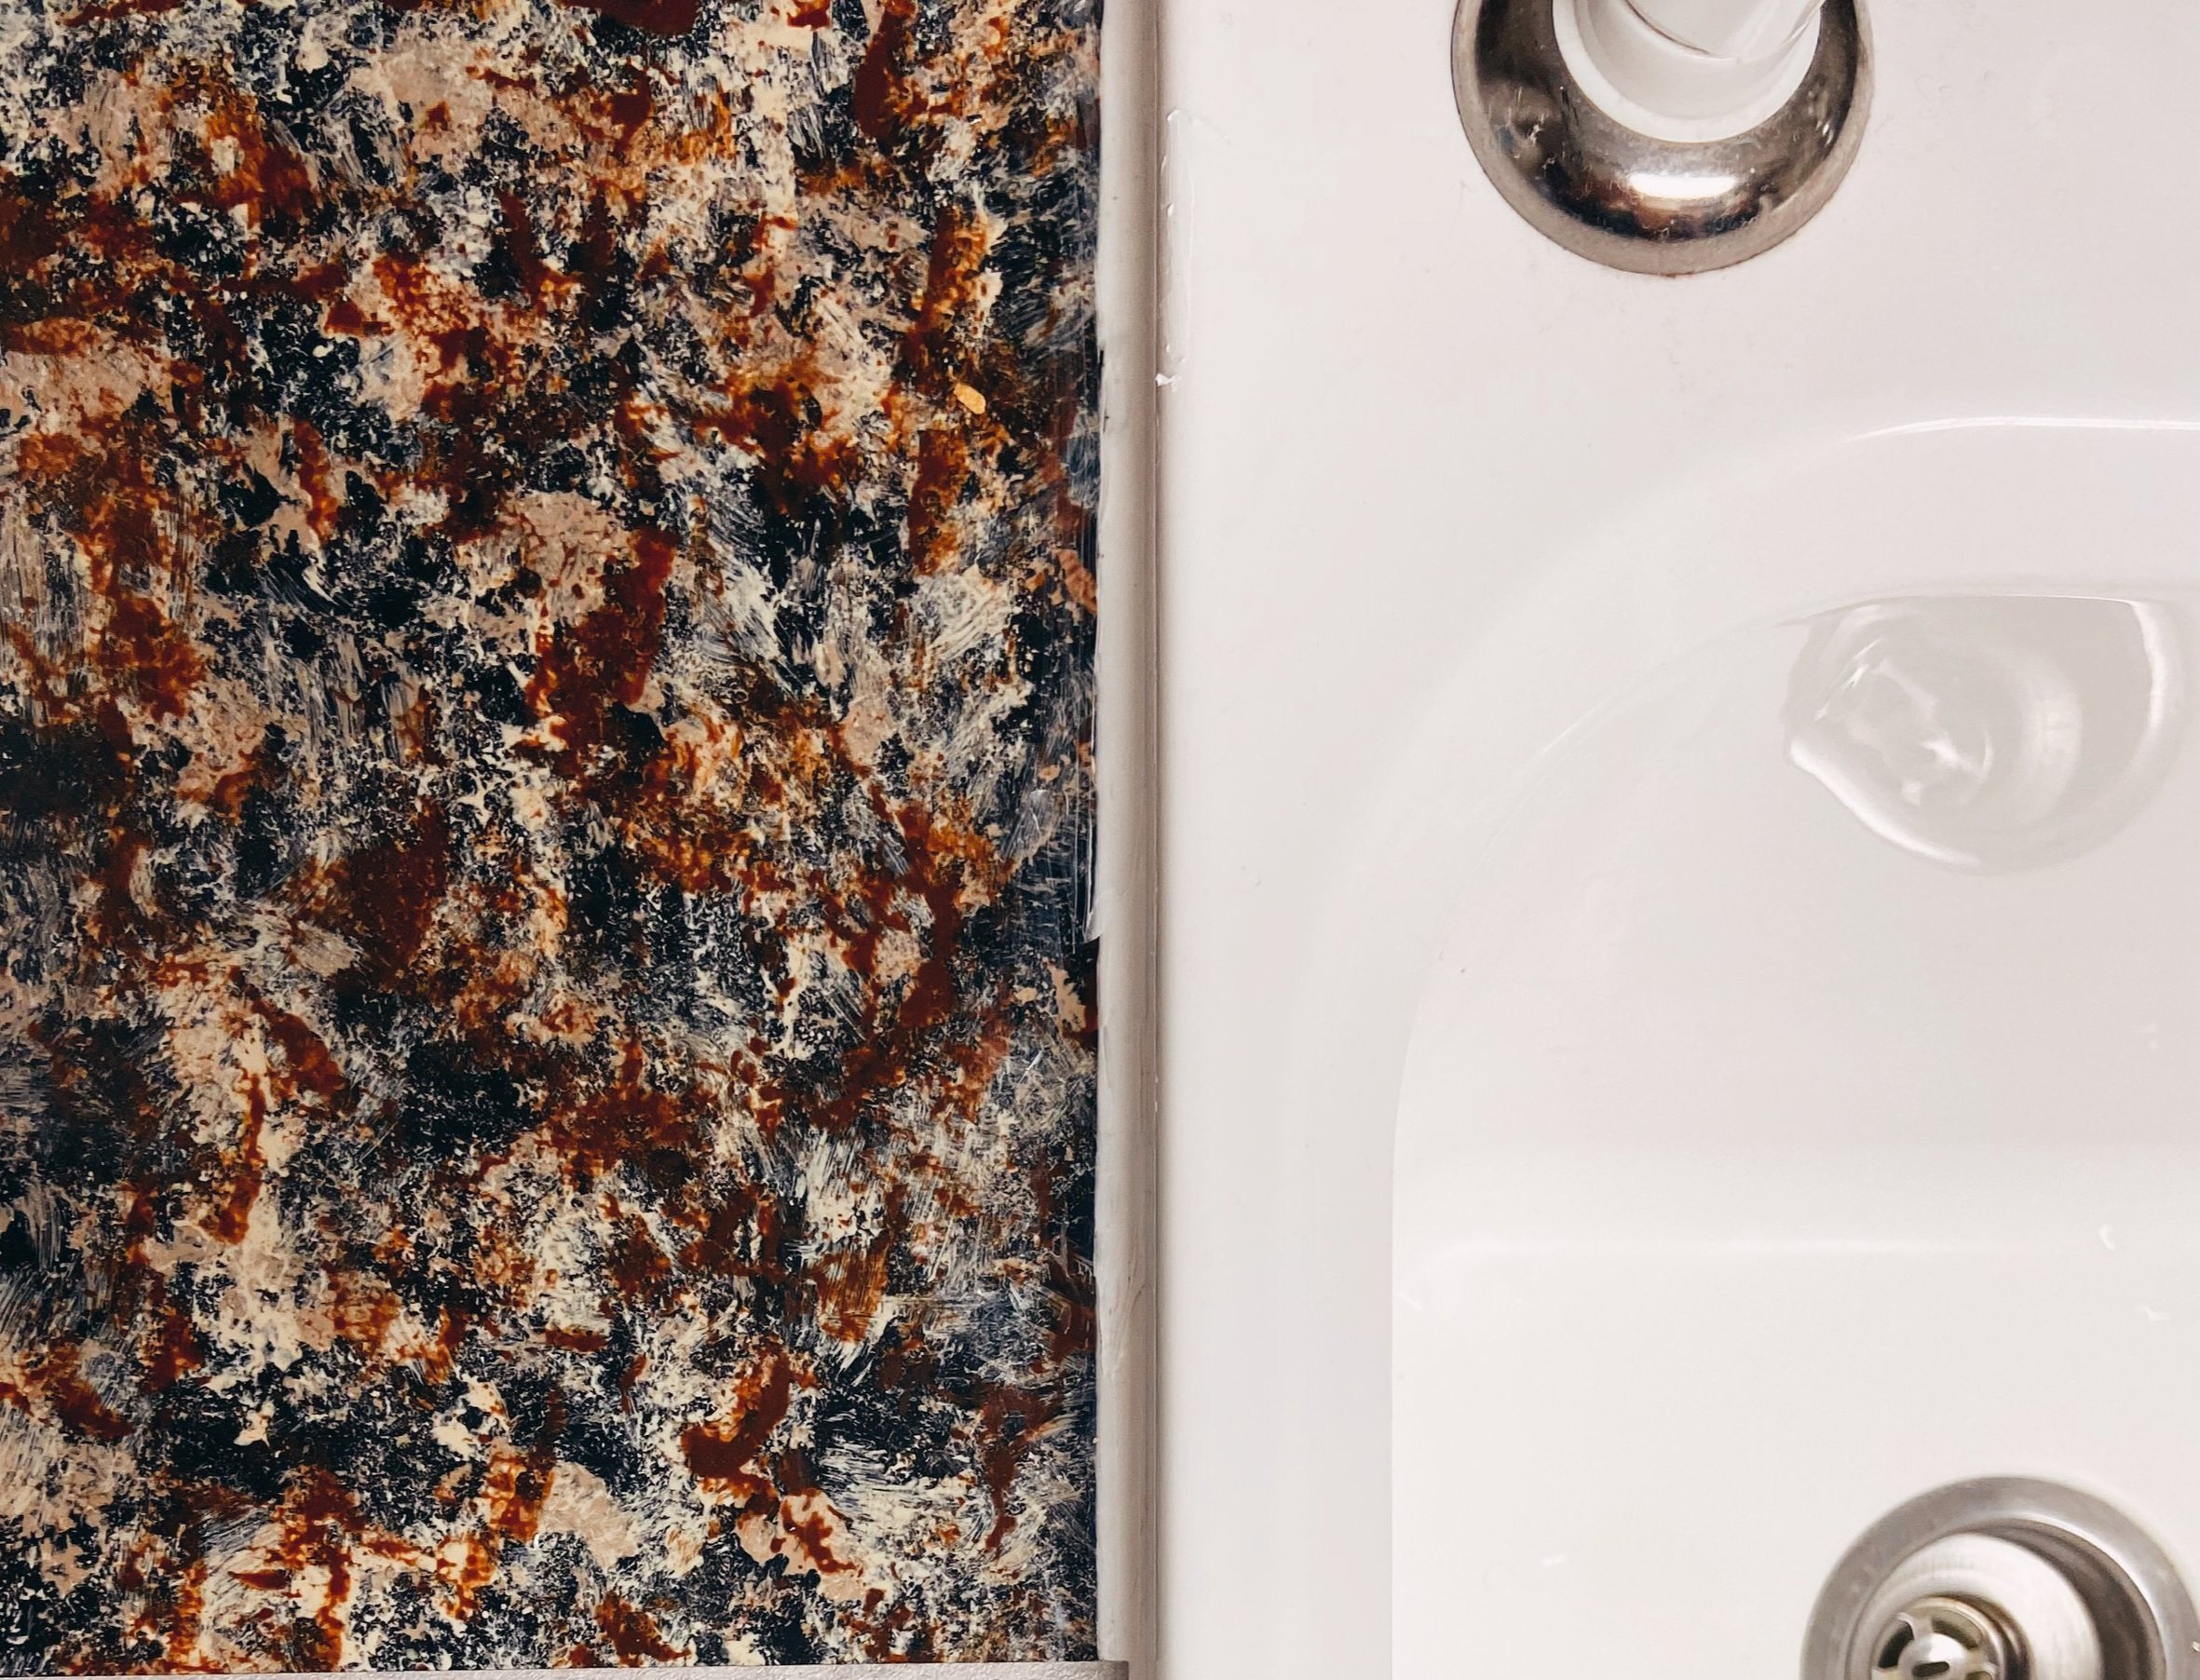
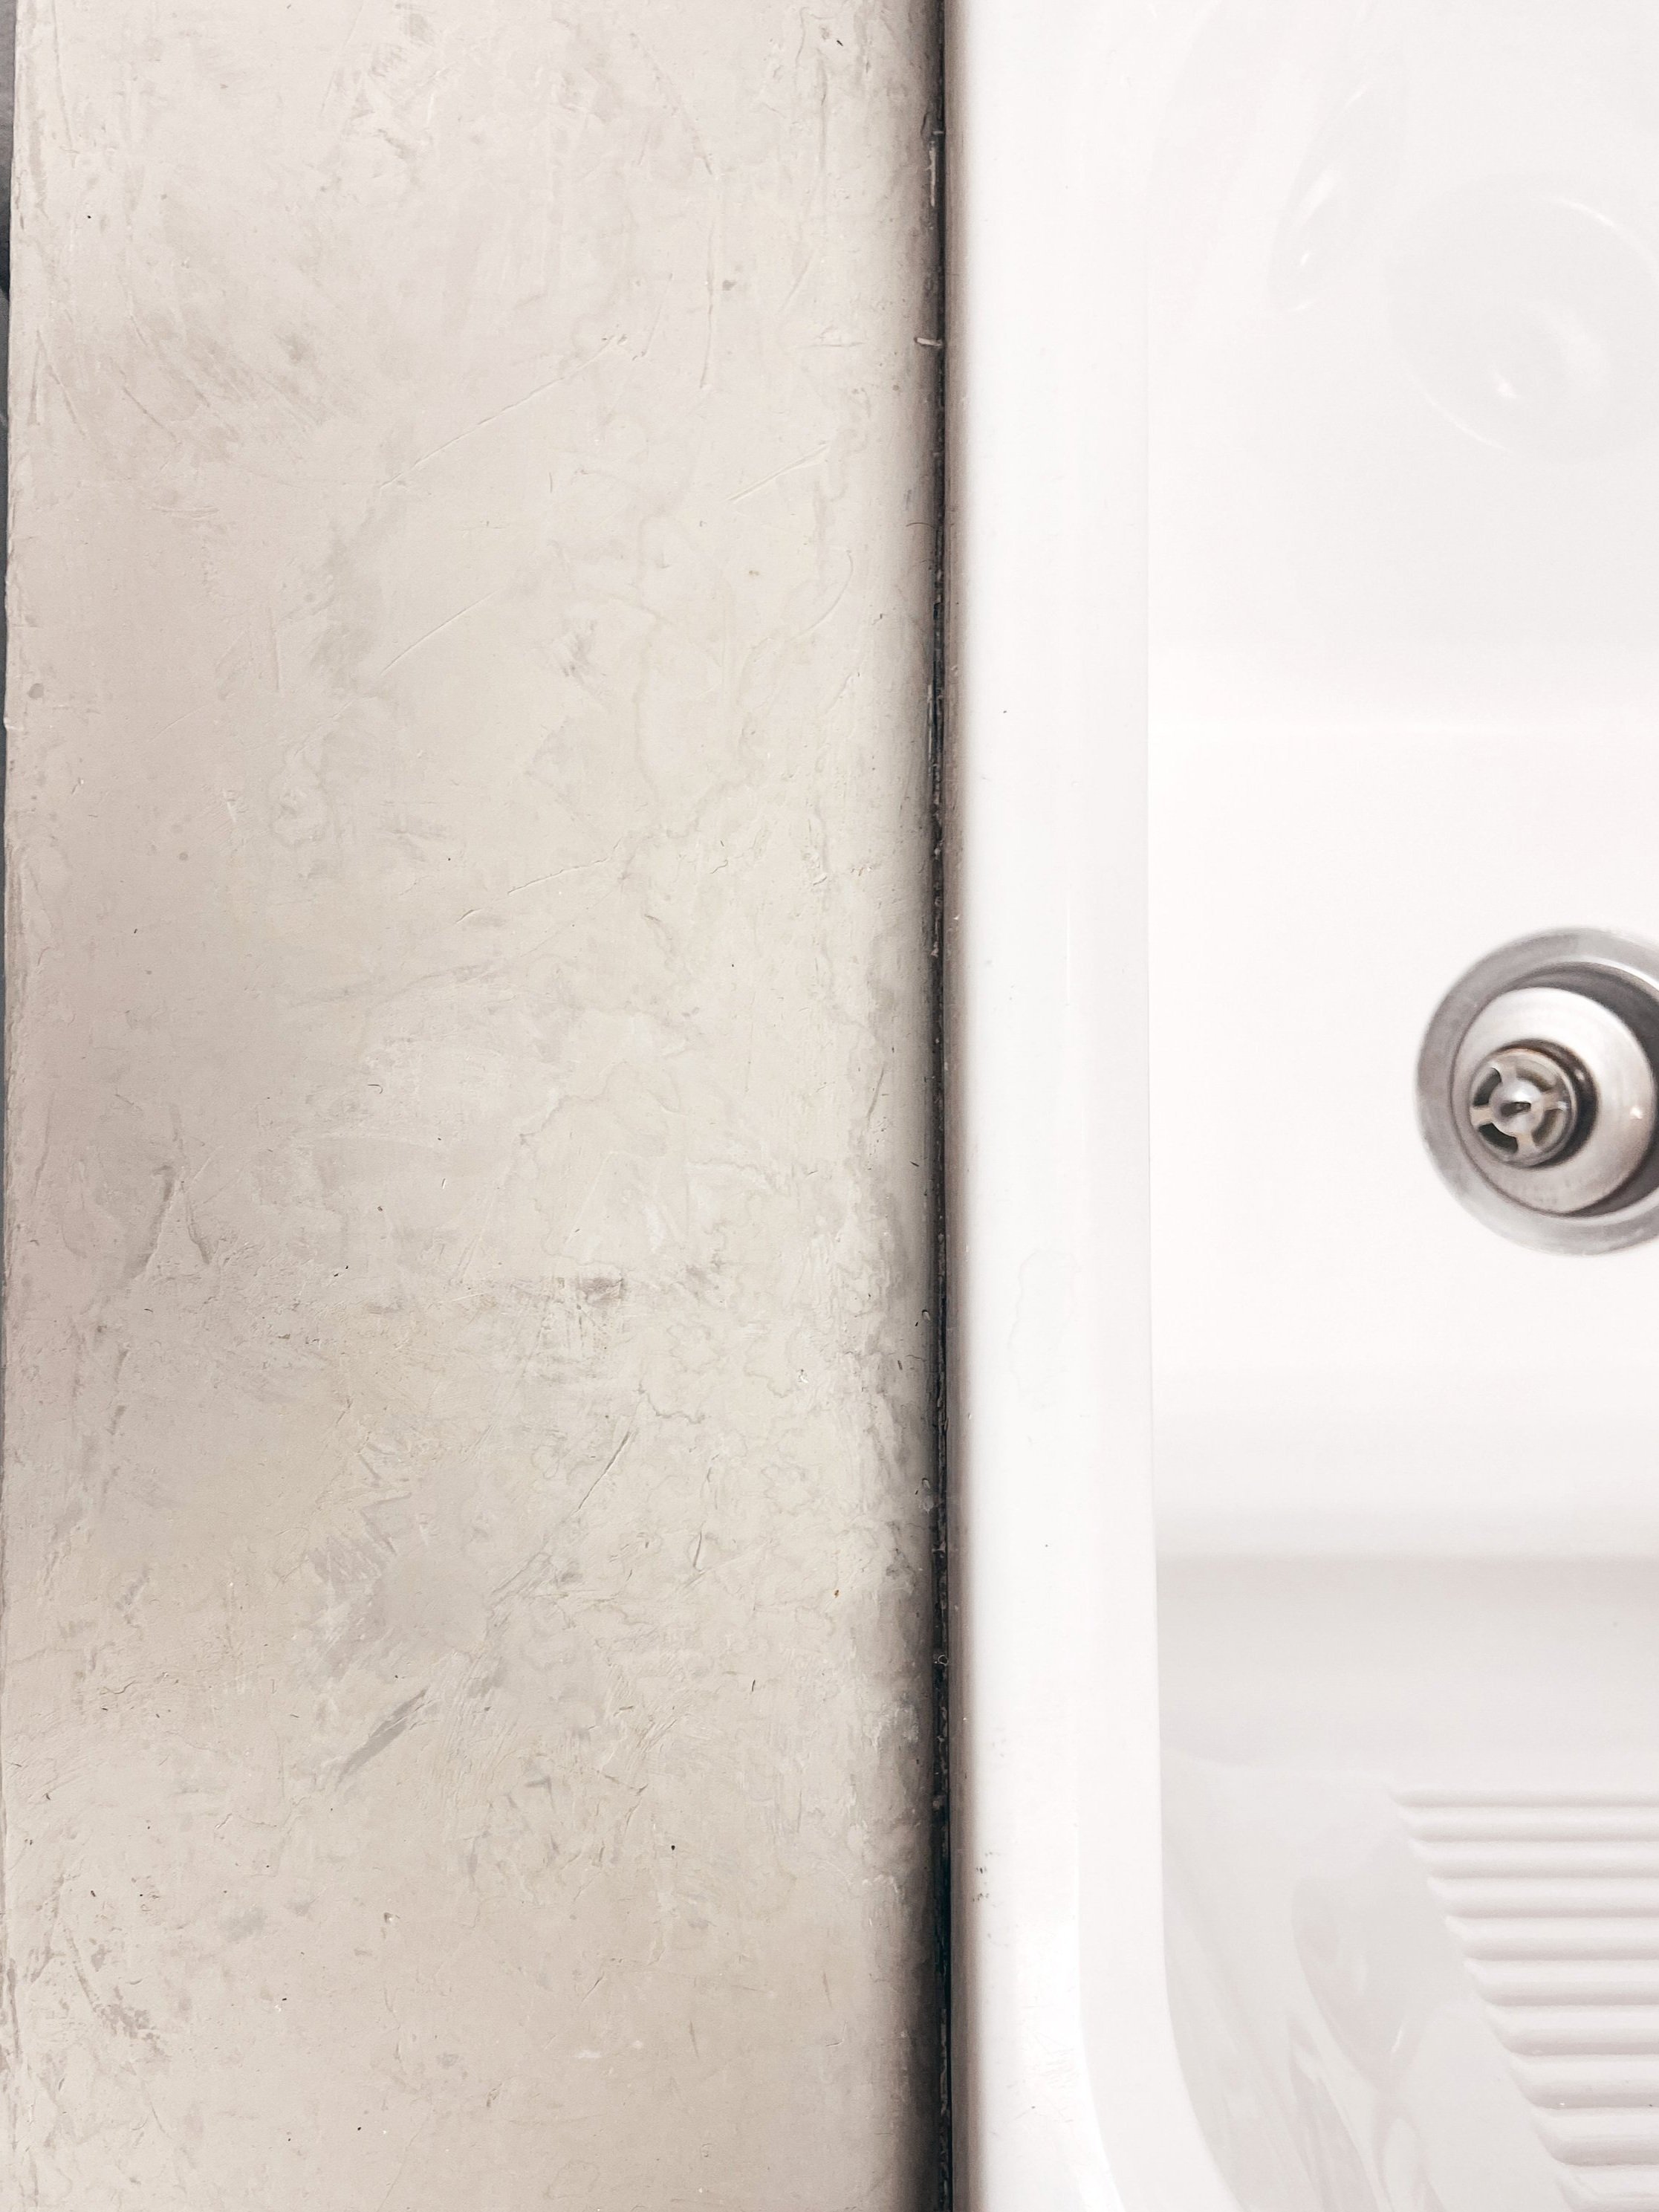
Next, the sink. Ouch… what an eyesore. At first we tried contact paper… I know a lot of people swear by it… it didn’t give me the look I wanted. We had some leftover Venetian plaster from one of mom’s jobs so we thought - heck what’s the worse that can happen. We thought for sure it was going to scratch or not work in some way, but months later and it’s holding up! We’re going to do one more coat and seal it at some point, but even with nightly baths and lots of splashing, it’s working great!
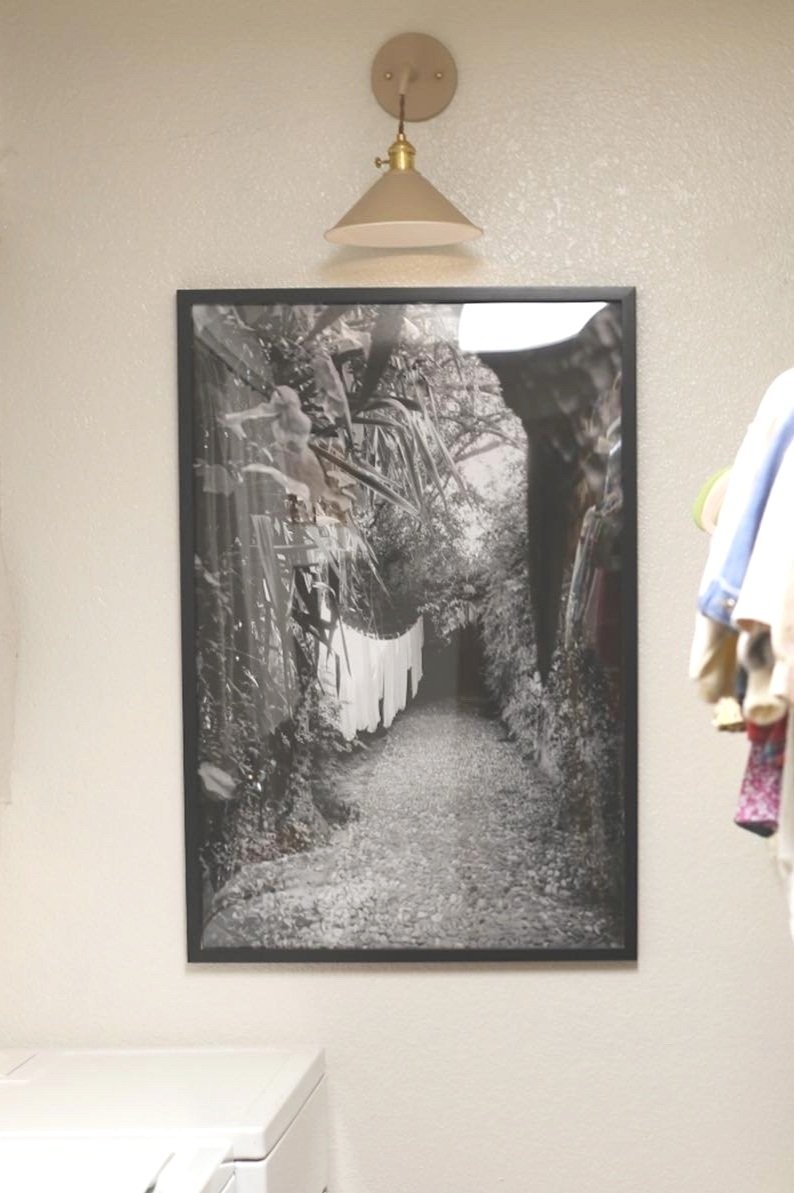
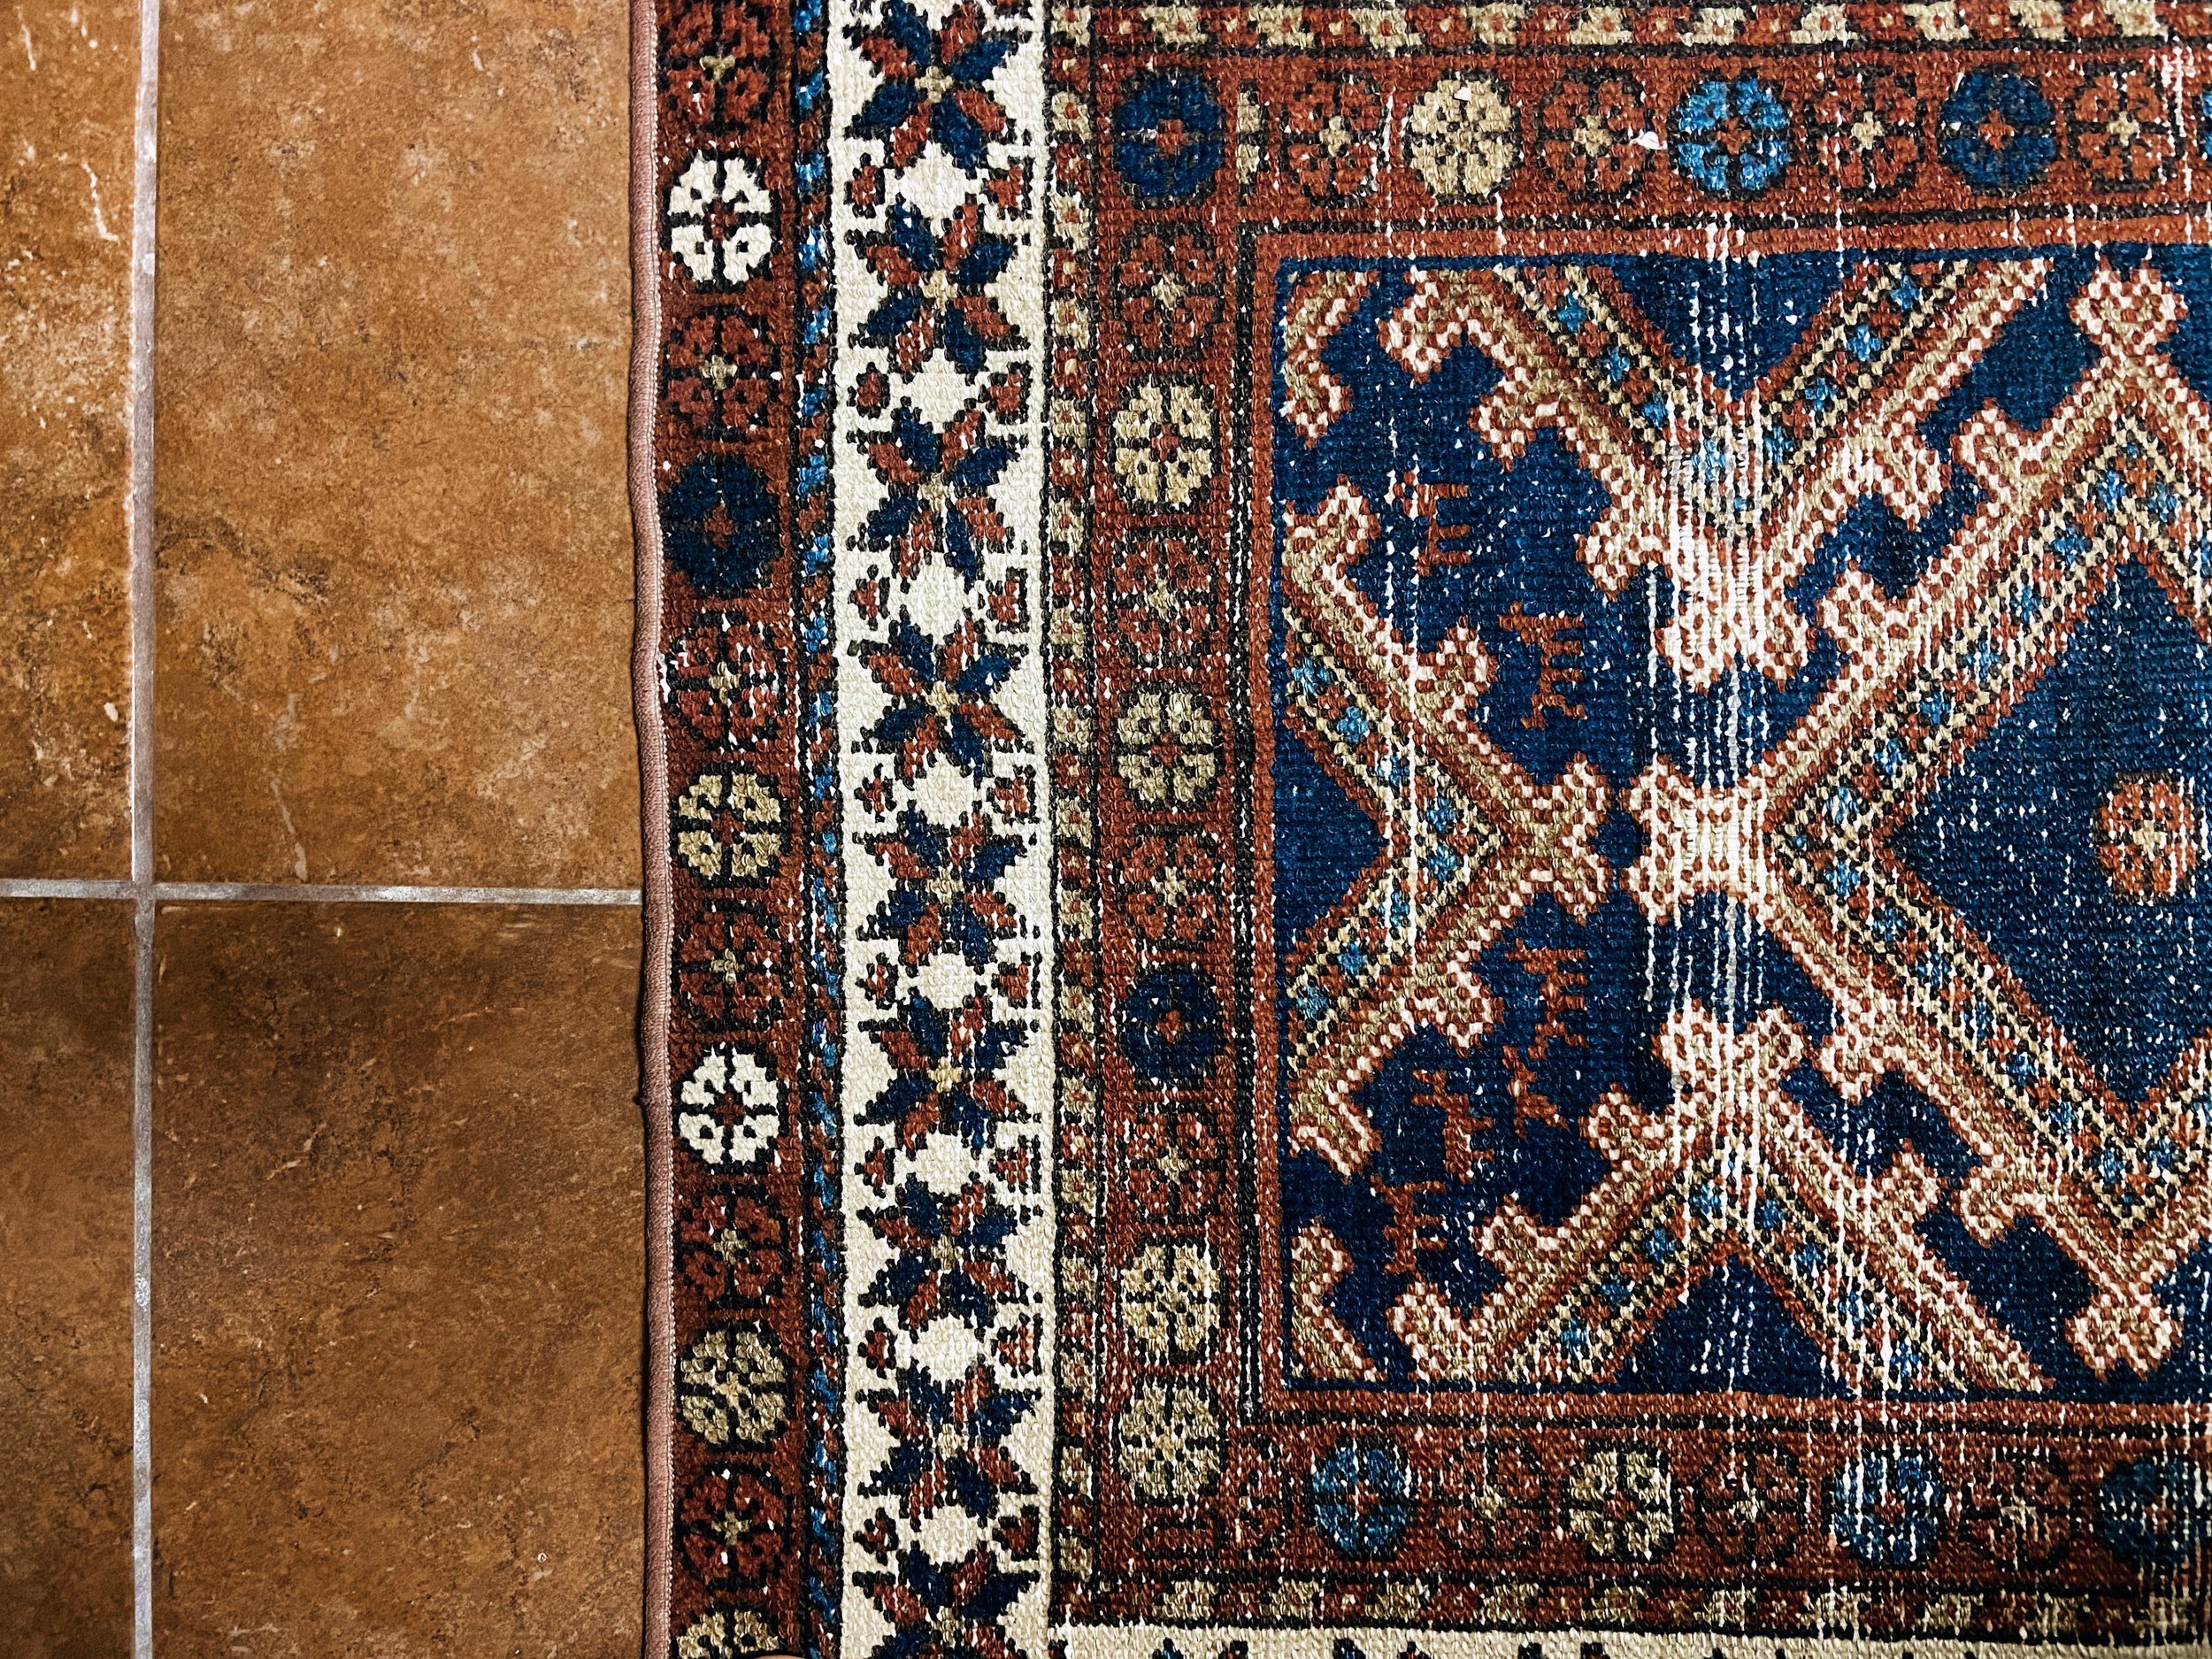
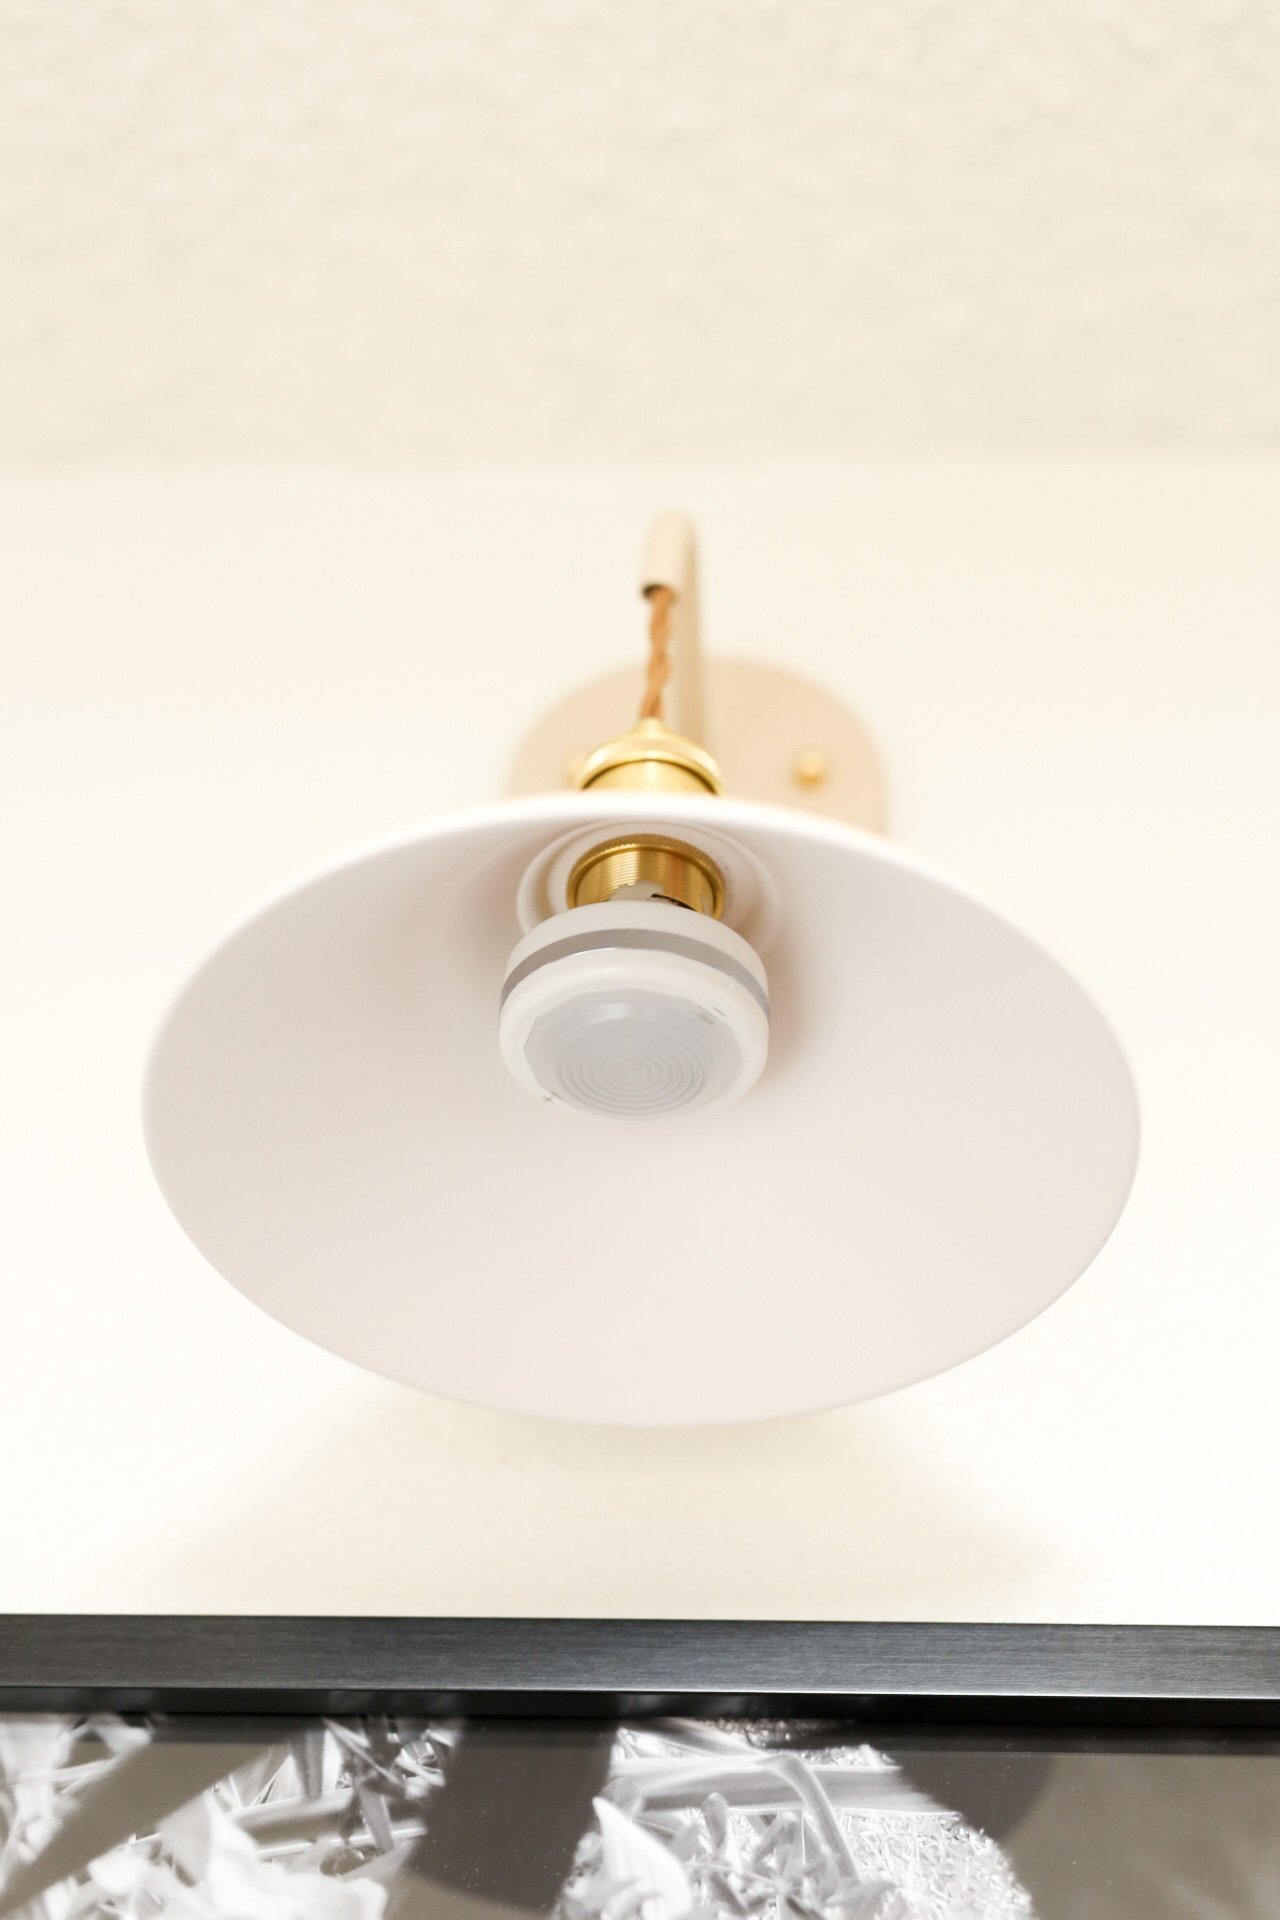
Finally, the details that wrapped it all together. I used a great rug my dad had in storage, printed a poster of a photo I took in Morocco on our honeymoon, and added a wall sconce and some puck lights under the cabinets. We didn’t have power on that wall, so we just used some battery lights. Keep scrolling if you’re curious/want to do this yourself. It’s great if you want some lighting but don’t have power in that specific spot. To finish it off, I swapped out a few white plastic items for black matte metal, added some metal platters for a backsplash, got some great laundry baskets from Ikea, and we called it done!


Costs & A Few Notes
Okay so I’ll fully admit that we were total scavengers at my dad’s office for most of this stuff… perks of having a designers as dad/grandmother/mom. So some of my costs aren’t fair, for instance the pie safe, rug, and plaster was all stolen from various locations at the shop, but I will say you can find some great deals thrifting, craigslist, and FB marketplace. I saw a pie safe the other day for $100.
LAUNDRY COSTS
I spent less thank $200 on this project because I was able to beg, borrow, and steal my way through some of the more expensive items. I think all in all you could do this for less than $400 easily, depending on your space. Considering the final product, and the fact that it’s all renter friendly, it’s not a bad investment to make your space look great and function for your needs.
Sconce – $39
Frame – $48 (2 pack)
Print – $55
Lights – $16
Paper towel holder – $8
Soap dispenser – $9 (similar)
Pie safe dupe $200 (or less)
Rug – $70 (depends on your space)
Laundry basket – $9 (each)
Drop cloth – $13
Hanging wire & clips – $13
Baskets — $32 (similar)
If you like the look of what I’ve done, I’ve linked some pieces that give the same feel and all the products I used that are available (some of the links are affiliate links). My favorite part of this space is the art work/wall sconce. When I took this photo in Morocco, I KNEW I wanted to print it one day and hang it in my house. This was taken in Tangier at Mimi Calpe, one of the amazing places we stayed while we were in Morocco. If you love the print, you can purchase one for your own space here. If you purchase the piece I’d love to see where you use it!
Puck Light How To
These are the best way to add light to a space when you don’t have power to that spot. You can use the heavy duty tape/glue + a socket plug or you can glue it directly to the sconce. I went with the plug in case I wanted to use this scone with power one day.


